[ATTACH=full]5208[/ATTACH]
Since people have been asking for decent noob-level tutorials to get into mapping for a while, I’ve decided to give it a shot. The idea is to introduce the basic tools progressively in a way that you can follow each of the tutorial sessions in periods between 30 and 60 minutes. Each tutorial will build up on the previous ones and will be paired with exercises/challenges so you can keep toying with the tools on your own.
This particular tutorial will focus on the very basics of mapping. I will introduce the most basic map one can create: a box with light in it. This is akin to ‘Hello world’ programs when learning to code, which aim to make the very basics familiar to newbies. I will ignore technicalities and simplify things so that they are easier to grasp. Every step will be accompanied by a screenshot I took while preparing the tutorial. Without further ado, we will dive right into it.
Our first step is to load up the editor, called Hammer. To run it, you need to install and run the SDK for whichever source game you want to map for, in our case CS:GO. Counter-Strike: Global Offensive - SDK appears in the ‘Tools’ section of your Steam Library. Once you install it and run it, you should get something similar to this:
At this point, we will clock on the Hammer World Editor label to open up the program. When it loads up, we will start a new map by clicking on the ‘File’ menu on the top left or by pressing CTRL + N on our keyboard. The result will be a window that resembles this:
Before doing any actual mapping, we have to understand what’s going on. We have a lot of buttons on screen now, and they certainly can be overwhelming. For this particular tutorial, we will focus on the most basic tools for the job, the ones you will use the most. You shouldn’t worry about anything else yet, so we will center our attention on the tool icons to the left, the 4 views in the center and the texture and entity menus to the right. Following that left-to-right order, we first find:
Although we can see more icons, I’ve removed those tools that are less commonly used. Those tools are the ones you will be using the most, and in this particular tutorial we will focus on the first three. Take a moment to hover your mouse over the icons and you’ll notice a hint pop up with the hotkeys to speed up switching to that tool. These shortcuts can greatly speed up your mapping and make you very proficient: learning them is a good idea.
To create our map, we have to start laying down blocks. Those blocks should have a material on them so that they resemble whatever we want to build. We will now select a material for the first time ever, going to the menu on the right and clicking on browse:
I tend to create the floors of my rooms first. There is no reason for it, I just do. Because of this, I will first select a floor, a tile floor in particular. To do this, I need a tile material, so I input ‘type’ in the material filter. The result is something similar to this:
With my tile texture selected, it’s time to create my first block. Those blocks are called ‘brushes’ in Hammer. Coincidently, we have a tool called ‘brush tool’; we will click on its icon to create the floor of our first map. After pressing the icon from the bar on the left, we will be able to click on any of the 3 grid-views to create a block. You should see something similar to this:
You can stretch the brush as you’d like, and when you’re done with it you either press the ENTER key or right click on it and press the ‘Create object’ button. After doing so, you will have placed your first brush, and you can click on the remaining 3D view to see it. To navigate on the 3D view, use your WASD and arrow keys. You should be able to see something like this:
Now it’s time for you to see if you’ve gotten the hang of it. With this floor in place, can you build the rest of the room? You will need 4 walls and a ceiling, with walls and ceiling using different textures from the floor. I’ve laid 4 walls and a ceiling with 2 textures that looked good enough on the browser and the result is the following:
Something like this should be your very first BOX ™ map. Notice that in my grid view, my brushes are placed so that their borders touch eachother. Tidiness is important, because when you build a big map things can get out of control and messy.
At this point, we want to be able to hop onto our map ingame. It is only natural, since it is our first BOX ™ map. First, we have to save our map. To do that, we open up the ‘File’ menu again and press on either ‘Save’ or ‘Save as’. You can also press CTRL + S. You’ll be getting something like:
Since we are very normal people, we will keep everything normal. In CS:GO, expert compiles are a must, but we will talk about that in a different tutorial. We will just simply press on the ‘OK’ button to start the compilation and…
After pressing on it, we can click left click on the 3D view to place a terrorist spawnpoint. You should place the spawnpoints inside the box, because otherwise they will be left in the endless void and probably die. Think of your box, of your map, as a spaceship. You kill your entities if you leave them out, and you kill them too if there’s a hole and the oxygen runs out. You don’t want to be a killer. This analogy will help us in future tutorials, but for now is just a silly joke.
We would like to place a counter-terrorist spawn too, so that we can join either team. The previous picture also shows the Entity block on the right-side bar. In it, you can scroll through the objects menu to select an info_player_counterterrorist entity (as opposed to info_player_terrorist). Select the CT entity and place it in the map by left-clicking in the 3D view. You should be seeing something like:
With those two spawnpoints, we can give compiling a go again. We will do so by following the same steps as earlier, through F9 or the ‘File’ menu. This time, we should compile without any sort of problem. We will launch the game after the compilation process finishes and we will then load the map. The result will be our fantastic BOX ™ MAP, which should look like:
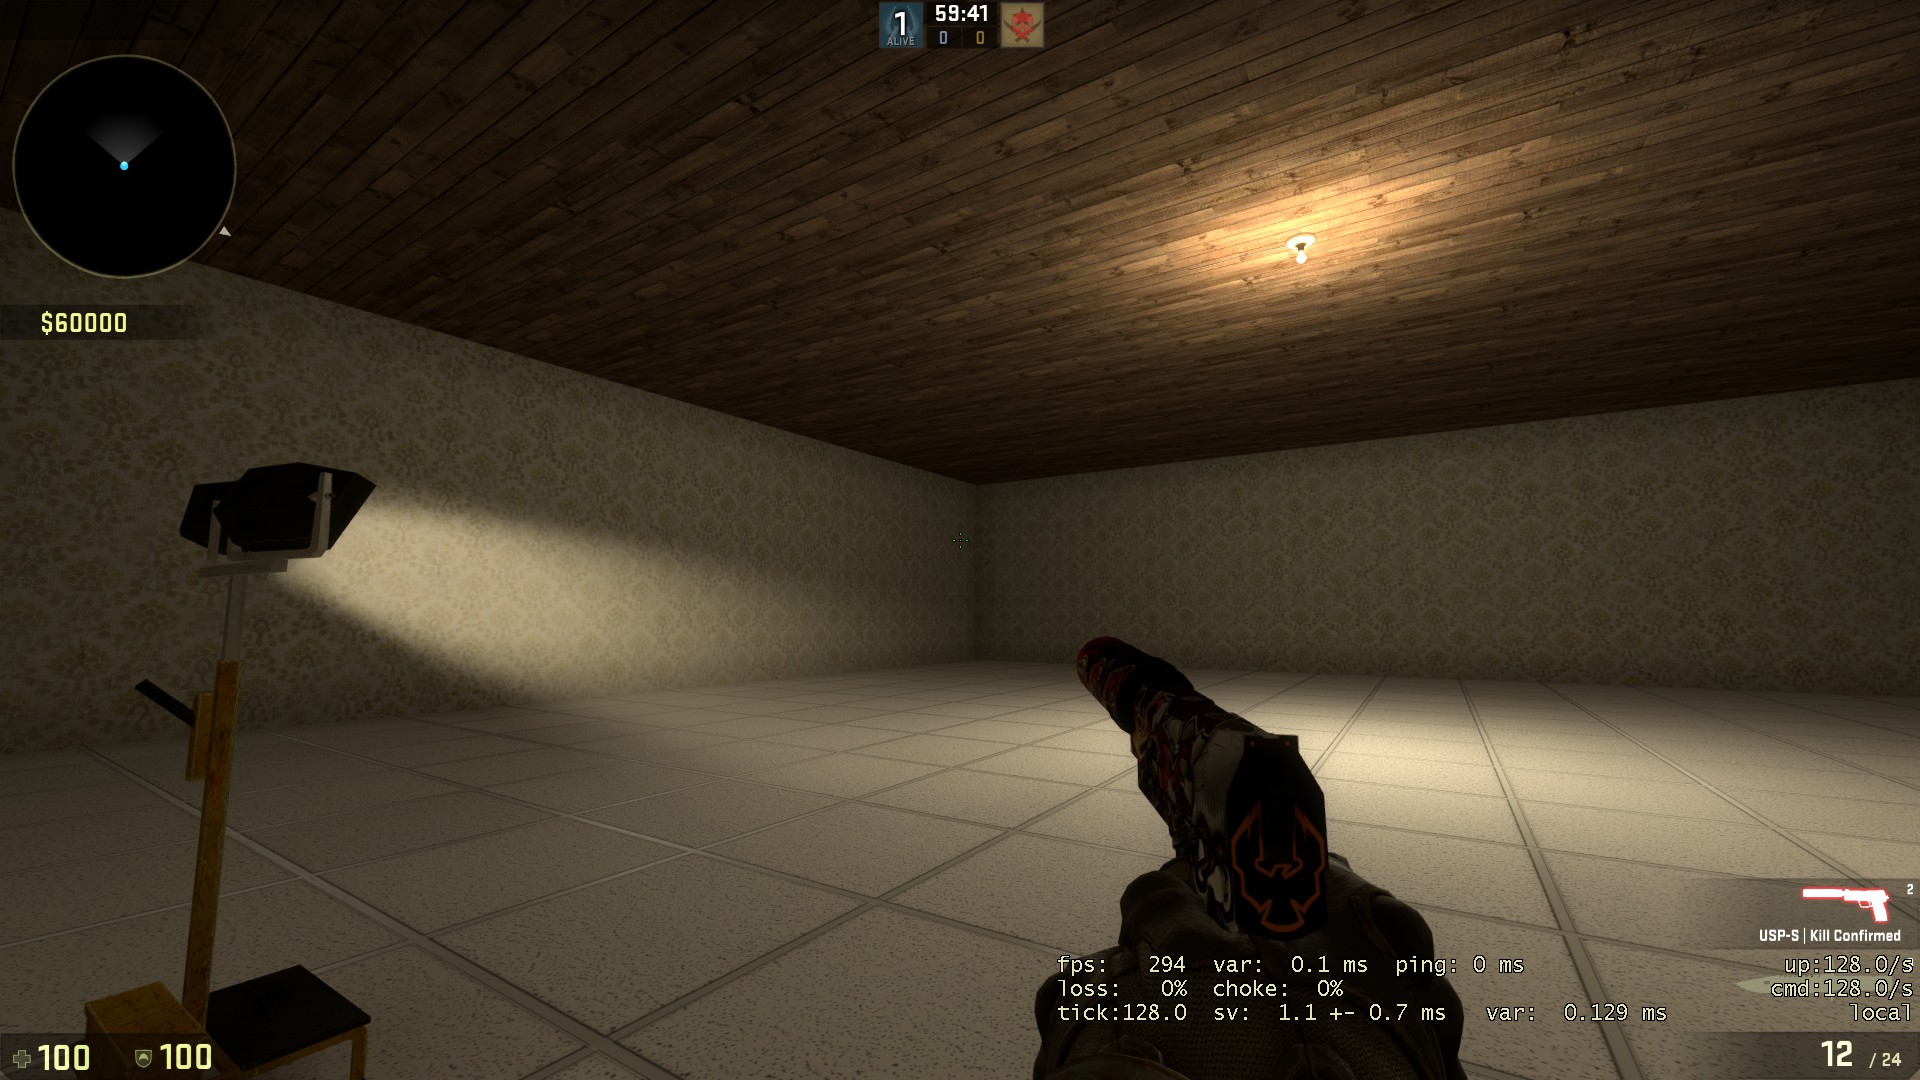
Something seems wrong with it, however. In particular, those black blobs are ugly. They are the result of compiling without any lighting information. We will, then, add out first light. Out measly box will be lit!
To place a light, we will have to create a light entity. The process is the same as with the spawnpoints, so we will select the Entity tool first and we will use a Light entity on the right side menu afterwards. We can now place our light by left clicking on the 3D view yet again, and your result should look like this:
And, at this point, it’s time to compile again. After doing so and loading the map ingame, you should get something that resembles:
If you’ve reached this point and you have managed to get something similar to the final screenshot, you are ready for a challenge. If not, you should try to figure out what went wrong by going through the steps again. If you can’t get it right, post in this thread.
CHALLENGES (Increasing difficulty):
- Although we have mentioned the Selecting tool, we haven’t explicitly used it. Look at the tutorial_room.vmf that is attached. Can you figure out how the entities were placed or moved so that they are aligned to the grid?
- The fact is that the light we used is very unnatural. Lights are rarely fully white in real life. Try double clicking on the light entity and playing with the values. Can you make the room get lit more naturally?
- Keep working with the brush tool and try to build something more complicated like, for example, your bedroom. What do you feel is missing from your tool arsenal? Can you figure out which of the tools we mentioned you should be using?
THINGS THAT COULD GO WRONG:
- You can’t spawn ingame after placing the spawns: The spawns might be too close to the floor/ceiling/walls. Everything is lava. Move them away a bit.
- The red error keeps appearing even after you place spawns: Your spaceship has a hole and you’re running out of oxygen. Find the hole and patch it.